Adding Google Analytics to your Next.js 15 App Router is incredibly simple. You don’t need to mess with scripts or long chunks of code. Instead, we’ll use Next.js's official Google Analytics component from the @next/third-parties library and your Google Analytics ID.
Let’s get started!
Google Analytics Account Creation
Step 1: Create a Google Analytics Account
- 2.Click the “Get Started Today” button.
- 3.Sign in with your Google account. If you don’t have one, create a new account.
- 4.On the welcome page, click “Start Measuring.”
Step 2: Set Up Your Account
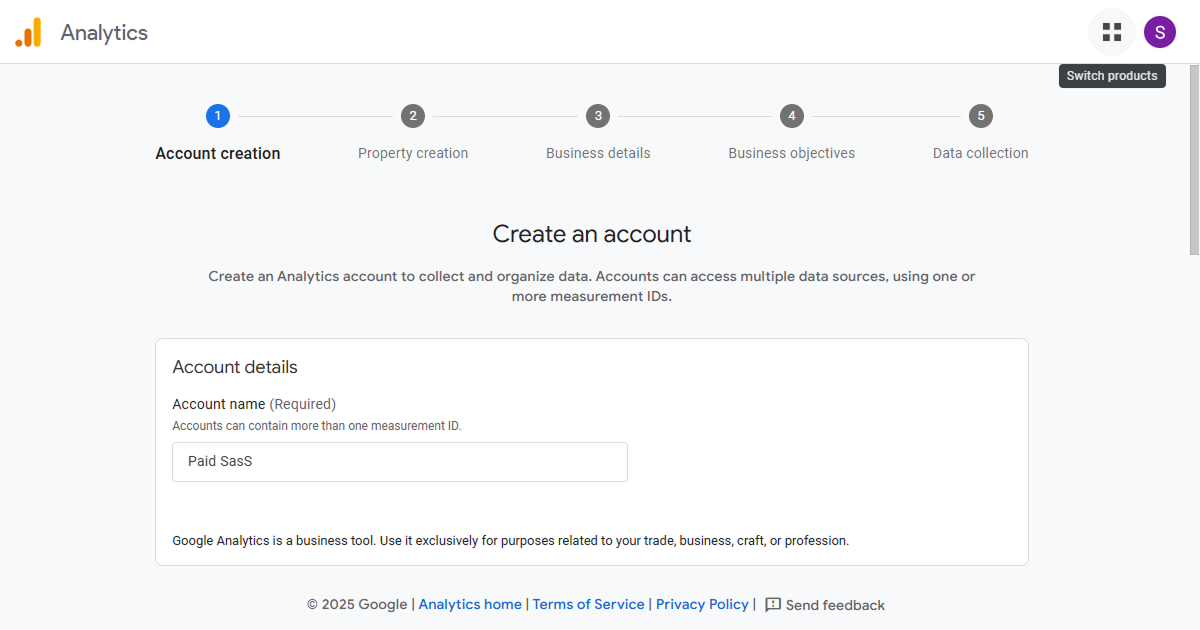
- 1.Fill in the Account Name (e.g., your business or website name).
Note: The account name is different from your Google Analytics ID. You’ll create a property under this account to track your website.
- 2.Scroll down and click Next.
Step 3: Create a Property
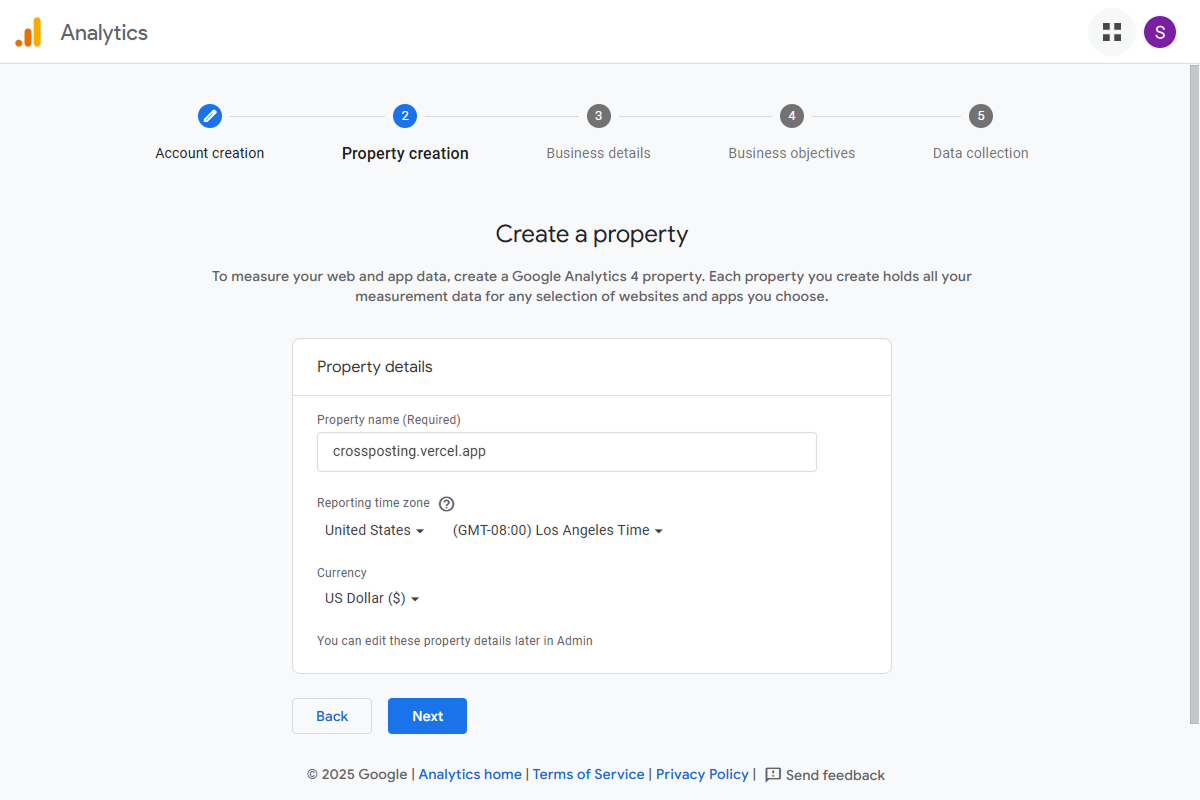
- 1.Enter a Property Name (e.g., your website domain name).
- 2.Adjust the Time Zone and Currency to match your location.
- 3.Click Next.
Step 4: Describe Your Business
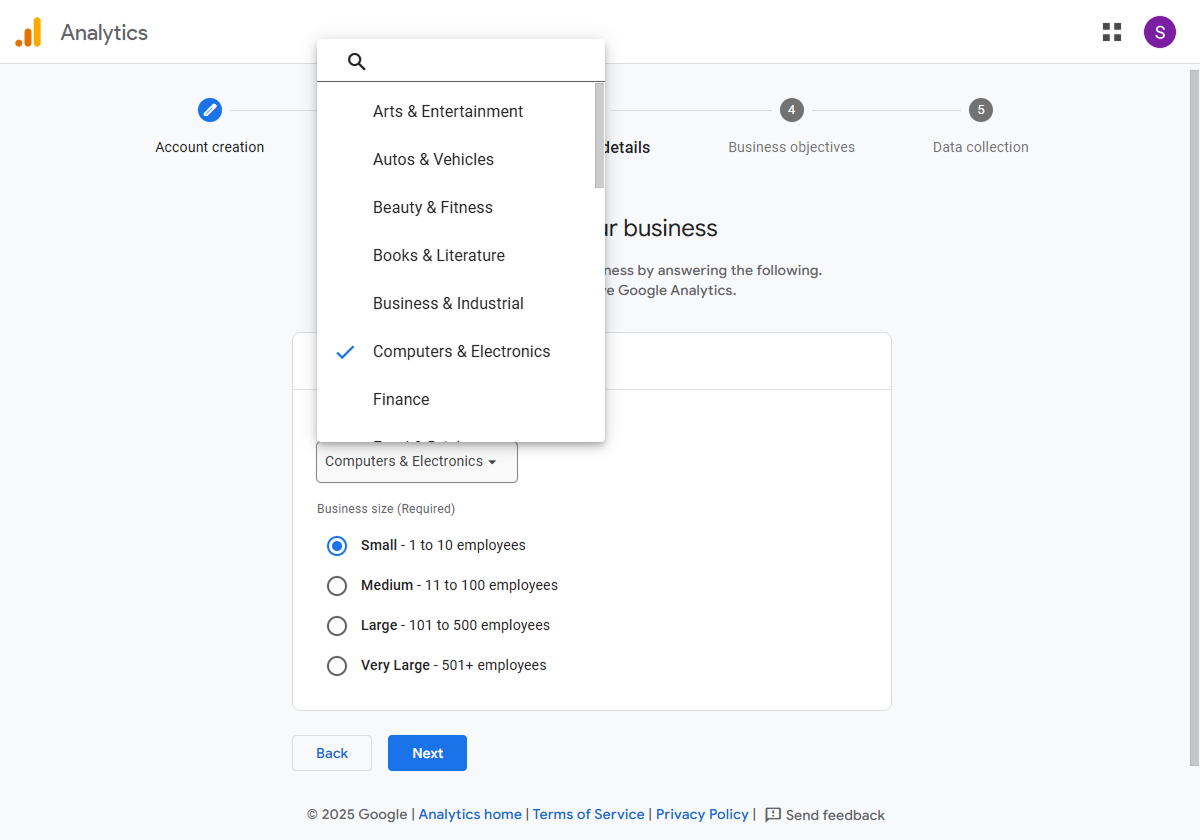
- 1.Select your Industry Category (e.g., Computers & Electronics).
- 2.Choose your Business Size (e.g., Small for 1–10 employees).
- 3.Click Next.
Step 5: Choose Your Business Objectives
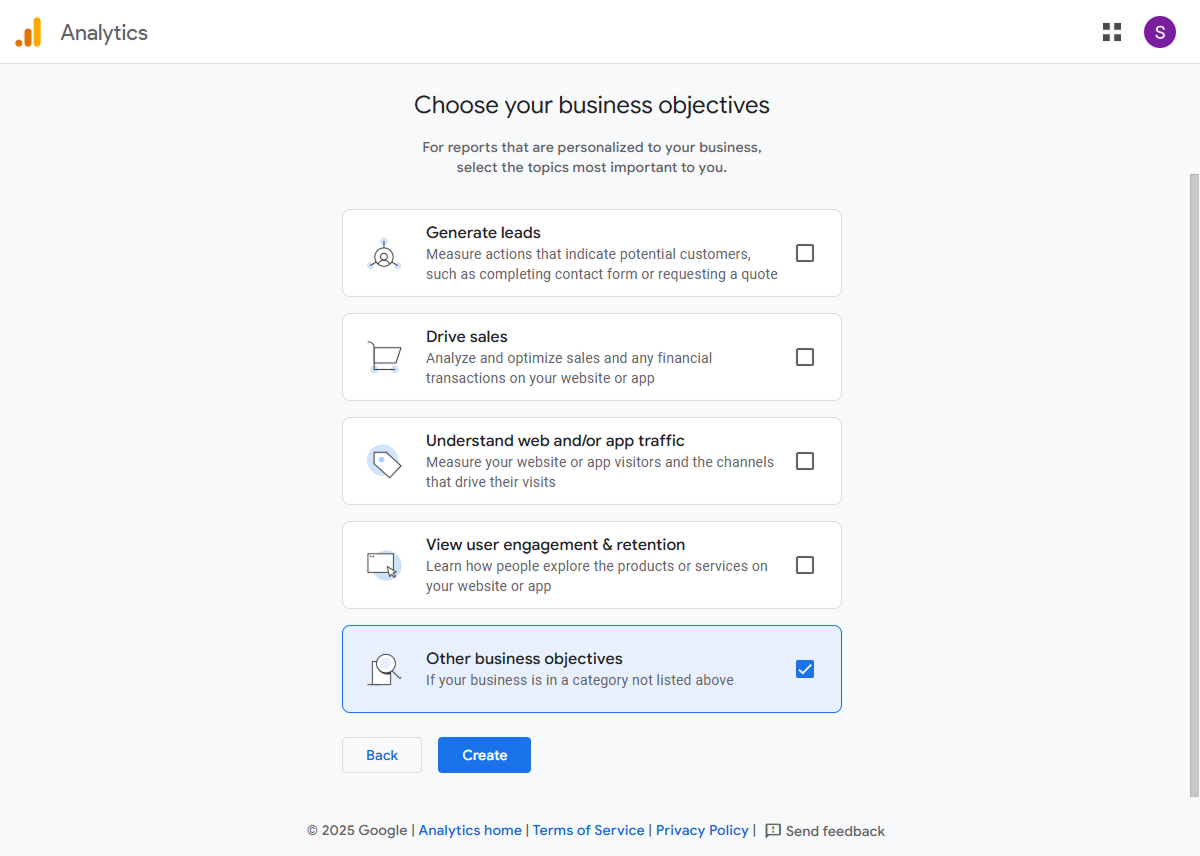
- 1.Select “Other Business Objectives” to enable all features.
- 2.Click Create.
- 3.Accept the Terms of Service and click I Accept.
Step 6: Set Up a Data Stream
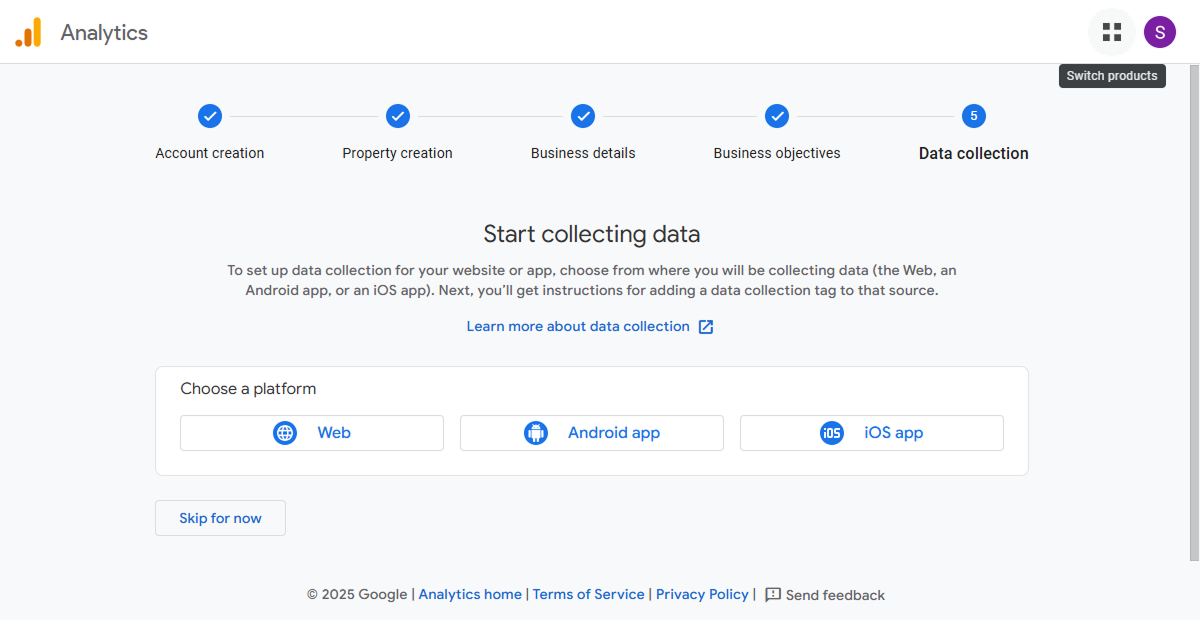
- 1.On the “Start Collecting Data” page, select Web.
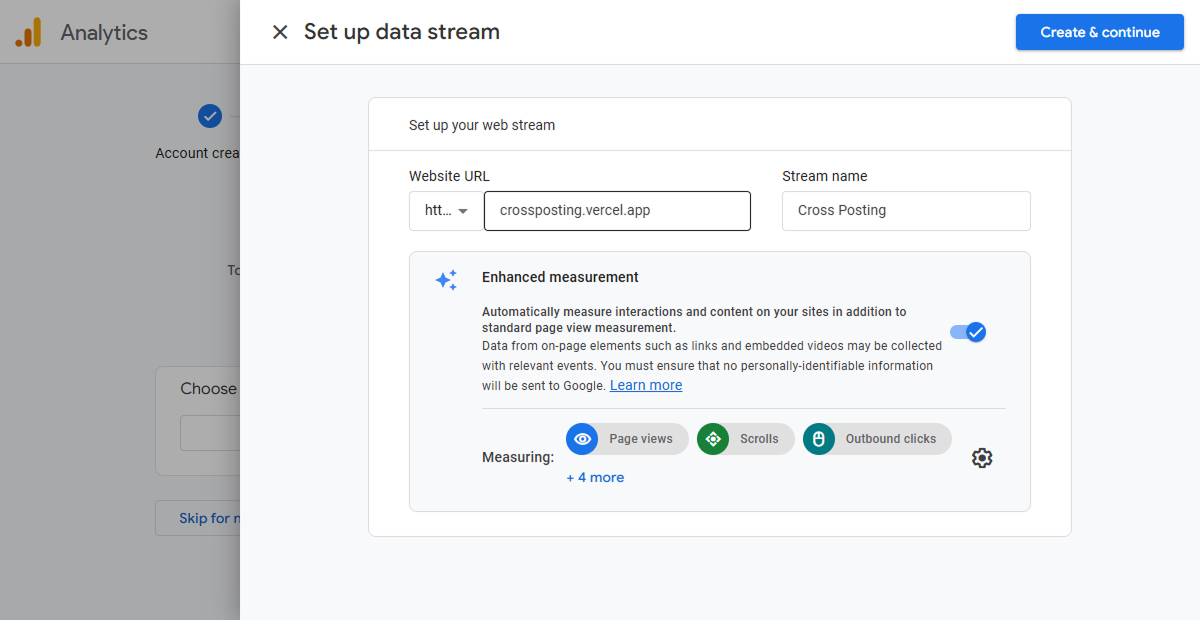
- 2.Enter your website URL (without
https://or trailing slashes/). - 3.Add a Stream Name (e.g., your website name).
- 4.Click Create and Continue.
- 5.Wait a moment—you’ll see the “Set up Google tag” page. Close it using the cross icon at the top.
Step 7: Copy Your Measurement ID
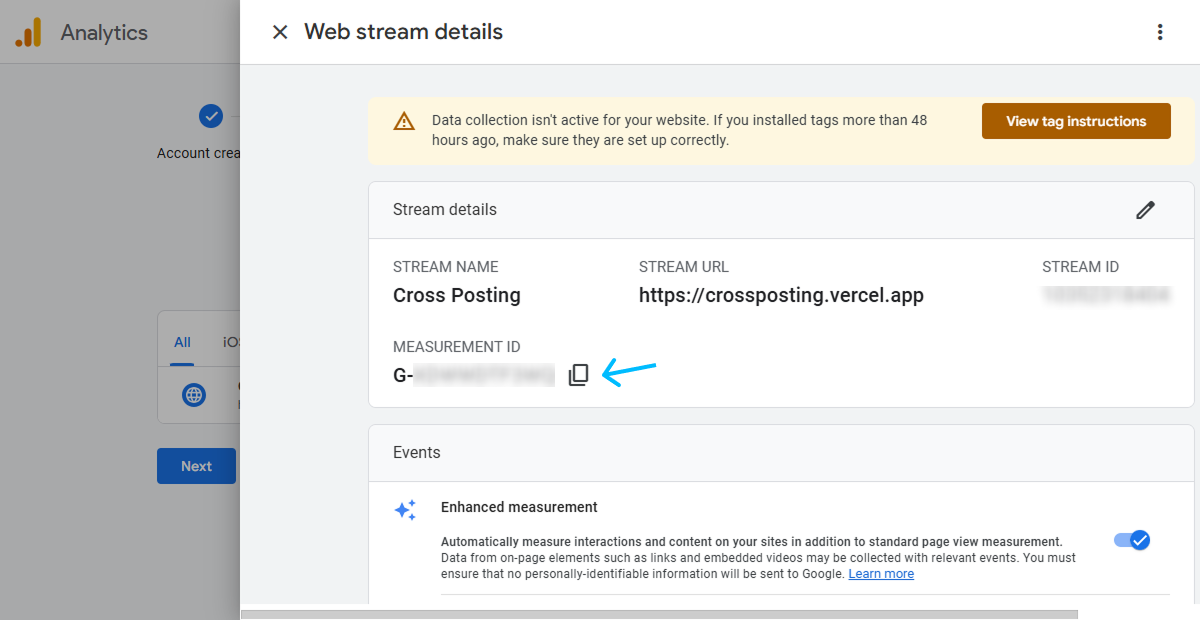
- 1.On the Web Stream Details page, locate your Measurement ID (starts with
G-). - 2.Copy this ID—you’ll need it for the Next.js setup.
- 3.Close the setup page. Click “Next” then click “Go to Home” to open your Google Analytics dashboard.
Adding Google Analytics to Your Next.js Website
Step 1: Install Google Analytics in Next.js 15
To integrate Google Analytics into your Next.js website, install the official @next/third-parties library. This simplifies adding third-party scripts like Google Analytics.
Open your project folder in VS Code and run one of the following commands:
For npm
npm install @next/third-parties@latest next@latestFor pnpm
pnpm install @next/third-parties@latest next@latestFor more details read the official documentation
Optimize the performance of third-party libraries in your application with the `@next/third-parties` package.
Step 2: Add Google Analytics to Your Main Layout File
Add the GoogleAnalytics component to your app/layout.jsx, or if you're using TypeScript, to app/layout.tsx.
For JavaScript use this:
import { GoogleAnalytics } from "@next/third-parties/google";
import "./globals.css";

export default function RootLayout({ children }) {
  return (
    <html lang="en">
      <body>{children}</body>

      {process.env.NEXT_PUBLIC_GOOGLE_ANALYTICS_ID &&
        process.env.NODE_ENV === "production" && (
          <GoogleAnalytics gaId={process.env.NEXT_PUBLIC_GOOGLE_ANALYTICS_ID} />
        )}
    </html>
  );
}For TypeScript use this:
import { GoogleAnalytics } from "@next/third-parties/google";
import "./globals.css";

export default function RootLayout({
  children,
}: {
  children: React.ReactNode;
}) {
  return (
    <html lang="en">
      <body>{children}</body>

      {process.env.NEXT_PUBLIC_GOOGLE_ANALYTICS_ID &&
        process.env.NODE_ENV === "production" && (
          <GoogleAnalyticsgaId={process.env.NEXT_PUBLIC_GOOGLE_ANALYTICS_ID!}
          />
        )}
    </html>
  );
}Key Points:
- The
GoogleAnalyticscomponent is only loaded in production mode (process.env.NODE_ENV === "production"). - Your Google Analytics Measurement ID is stored in the
NEXT_PUBLIC_GOOGLE_ANALYTICS_IDenvironment variable.
Step 3: Add Your Measurement ID to Environment Variables
- 1.Create a
.env.localfile in the root of your project (if it doesn’t already exist). - 2.Add the following line:Plain TextCopy
NEXT_PUBLIC_GOOGLE_ANALYTICS_ID=G-XXXXXXXReplace
G-XXXXXXXwith your actual Measurement ID.
Why use environment variables?
- Makes it easy to update the ID without changing your code.
- Keeps sensitive data out of your source files.
Step 4: Verify Your Setup
- 1.Deploy Your Next.js Project:
- Make sure to update the environment variable (
NEXT_PUBLIC_GOOGLE_ANALYTICS_ID) with your Measurement ID before deployment. - Deploy your project to your hosting platform (e.g., Vercel, Netlify, or any other).
- Alternatively, you can test it locally in production mode by runningBashCopy
npm run buildafter build is completed run the build using this command
BashCopynpm run start
- 2.Check Real-Time Tracking:
- Visit your website in a new browser tab or incognito window.
- Open your Google Analytics dashboard and navigate to the Real-Time section.
- Confirm that your website traffic is being tracked by checking for active users or pageviews.
- 3.Troubleshooting:
- If no data appears, double-check the following:
- Ensure the
NEXT_PUBLIC_GOOGLE_ANALYTICS_IDenvironment variable is correctly set. - Verify that the
GoogleAnalyticscomponent is only running in production mode (process.env.NODE_ENV === "production"). - Clear your browser cache or try accessing the site from a different device.
Conclusion
That’s it! You’ve successfully added Google Analytics to your Next.js website using the official @next/third-parties library. It’s a simple and reliable method to track your website traffic without extra complexity.
