

How to Implement Static Code Syntax Highlighting with PrismJS in Next.js (Dark & Light Theme Support)
Learn how to easily add static code syntax highlighting to your Next.js project using PrismJS, with seamless support for dark and light themes. Step-by-step guide to enhance your code readability and boost your website's visual appeal.

In this tutorial, we'll walk through how to integrate PrismJS for code block syntax highlighting in a Next.js app with dark and light theme support. You'll need a Next.js app with the App Router and Tailwind CSS already installed.
Step 1: Install PrismJS
First, install PrismJS by running the following command:
npm i prismjsStep 2: Create the Code Component
In the src folder, create a components folder. If you don't have a src folder, create one in the root directory. Inside the components folder, create a code.jsx file and paste the following code:
import Prism from "prismjs";

import "prismjs/components/prism-abap";
import "prismjs/components/prism-agda";
// using NASM for highlighting Assembly code
import "prismjs/components/prism-nasm";
import "prismjs/components/prism-bash";
import "prismjs/components/prism-basic";
import "prismjs/components/prism-bnf";
import "prismjs/components/prism-c";
import "prismjs/components/prism-csharp";
import "prismjs/components/prism-cpp";
import "prismjs/components/prism-clojure";
import "prismjs/components/prism-coffeescript";
import "prismjs/components/prism-coq";
import "prismjs/components/prism-css";
import "prismjs/components/prism-dart";
import "prismjs/components/prism-dhall";
import "prismjs/components/prism-diff";
import "prismjs/components/prism-docker";
import "prismjs/components/prism-ebnf";
import "prismjs/components/prism-elixir";
import "prismjs/components/prism-elm";
import "prismjs/components/prism-erlang";
import "prismjs/components/prism-fsharp";
import "prismjs/components/prism-flow";
import "prismjs/components/prism-fortran";
import "prismjs/components/prism-gherkin";
import "prismjs/components/prism-glsl";
import "prismjs/components/prism-go";
import "prismjs/components/prism-graphql";
import "prismjs/components/prism-groovy";
import "prismjs/components/prism-haskell";
import "prismjs/components/prism-idris";
import "prismjs/components/prism-java";
// using jsx instead of javascript
import "prismjs/components/prism-javascript";
import "prismjs/components/prism-jsx";
import "prismjs/components/prism-json";
import "prismjs/components/prism-julia";
import "prismjs/components/prism-kotlin";
import "prismjs/components/prism-latex";
import "prismjs/components/prism-less";
import "prismjs/components/prism-lisp";
import "prismjs/components/prism-livescript";
import "prismjs/components/prism-llvm";
import "prismjs/components/prism-lua";
import "prismjs/components/prism-makefile";
import "prismjs/components/prism-markdown";
import "prismjs/components/prism-markup";
import "prismjs/components/prism-matlab";
// using Wolfram for highlighting Mathematica code
import "prismjs/components/prism-wolfram";
import "prismjs/components/prism-mermaid";
import "prismjs/components/prism-nix";
import "prismjs/components/prism-objectivec";
import "prismjs/components/prism-ocaml";
import "prismjs/components/prism-pascal";
import "prismjs/components/prism-perl";
import "prismjs/components/prism-powershell";
import "prismjs/components/prism-prolog";
import "prismjs/components/prism-protobuf";
import "prismjs/components/prism-purescript";
import "prismjs/components/prism-python";
import "prismjs/components/prism-r";
import "prismjs/components/prism-reason";
import "prismjs/components/prism-ruby";
import "prismjs/components/prism-rust";
import "prismjs/components/prism-sass";
import "prismjs/components/prism-scala";
import "prismjs/components/prism-scheme";
import "prismjs/components/prism-scss";
import "prismjs/components/prism-solidity";
import "prismjs/components/prism-sql";
import "prismjs/components/prism-swift";
import "prismjs/components/prism-toml";
import "prismjs/components/prism-typescript";
import "prismjs/components/prism-vbnet";
import "prismjs/components/prism-verilog";
import "prismjs/components/prism-vhdl";
import "prismjs/components/prism-visual-basic";
import "prismjs/components/prism-wasm";
import "prismjs/components/prism-xml-doc";
import "prismjs/components/prism-yaml";
import "prismjs/components/prism-racket";
import "prismjs/components/prism-markup-templating";
import "prismjs/components/prism-php";
import "prismjs/components/prism-arduino";

// Language capitalization mapping
const languageMapping = {
  abap: "ABAP",
  agda: "Agda",
  arduino: "Arduino",
  assembly: "Assembly",
  bash: "Bash",
  basic: "BASIC",
  bnf: "BNF",
  c: "C",
  "c#": "C#",
  "c++": "C++",
  clojure: "Clojure",
  coffeescript: "CoffeeScript",
  coq: "Coq",
  css: "CSS",
  dart: "Dart",
  dhall: "Dhall",
  diff: "Diff",
  docker: "Docker",
  ebnf: "EBNF",
  elixir: "Elixir",
  elm: "Elm",
  erlang: "Erlang",
  "f#": "F#",
  flow: "Flow",
  fortran: "Fortran",
  gherkin: "Gherkin",
  glsl: "GLSL",
  go: "Go",
  graphql: "GraphQL",
  groovy: "Groovy",
  haskell: "Haskell",
  html: "HTML",
  idris: "Idris",
  java: "Java",
  javascript: "JavaScript",
  json: "JSON",
  julia: "Julia",
  kotlin: "Kotlin",
  latex: "LaTeX",
  less: "Less",
  lisp: "Lisp",
  livescript: "LiveScript",
  "llvm ir": "LLVM IR",
  lua: "Lua",
  makefile: "Makefile",
  markdown: "Markdown",
  markup: "Markup",
  matlab: "MATLAB",
  mathematica: "Mathematica",
  mermaid: "Mermaid",
  nix: "Nix",
  "notion formula": "Notion Formula",
  "objective-c": "Objective-C",
  ocaml: "OCaml",
  pascal: "Pascal",
  perl: "Perl",
  php: "PHP",
  "plain text": "Plain Text",
  powershell: "PowerShell",
  prolog: "Prolog",
  protobuf: "Protobuf",
  purescript: "PureScript",
  python: "Python",
  r: "R",
  racket: "Racket",
  reason: "Reason",
  ruby: "Ruby",
  rust: "Rust",
  sass: "Sass",
  scala: "Scala",
  scheme: "Scheme",
  scss: "SCSS",
  shell: "Shell",
  solidity: "Solidity",
  sql: "SQL",
  swift: "Swift",
  toml: "TOML",
  typescript: "TypeScript",
  "vb.net": "VB.Net",
  verilog: "Verilog",
  vhdl: "VHDL",
  "visual basic": "Visual Basic",
  webassembly: "WebAssembly",
  xml: "XML",
  yaml: "YAML",
};

export default function Code({ block }) {

  const codeContent = block.code.rich_text[0].plain_text;
  const language = block.code.language;
  const displayLanguage = languageMapping[language] || language;

  // Check if the language exists in Prism.languages
  const prismLanguage =
    language === "javascript"
      ? Prism.languages.jsx
      : language === "assembly"
      ? Prism.languages.nasm
      : language === "c#"
      ? Prism.languages.csharp
      : language === "c++"
      ? Prism.languages.cpp
      : language === "f#"
      ? Prism.languages.fsharp
      : language === "llvm ir"
      ? Prism.languages.llvm
      : language === "mathematica"
      ? Prism.languages.wolfram
      : language === "objective-c"
      ? Prism.languages.objectivec
      : language === "vb.net"
      ? Prism.languages.vbnet
      : language === "webassembly"
      ? Prism.languages.wasm
      : language === "visual basic"
      ? Prism.languages["visual-basic"]
      : Prism.languages[language] || Prism.languages.plain;

  const highlightedCode = Prism.highlight(codeContent, prismLanguage, language);

  return (
      <figure className="my-1 last:mb-0 group/code-block">
        <div className="relative rounded bg-notion-code_block_background">
          <div className="absolute z-[1] top-2 left-2 flex items-center h-5 px-[0.3125rem] text-notion-caption_color text-[0.75rem] leading-[1.2] opacity-100 md:opacity-0 md:group-hover/code-block:opacity-100 [transition:_opacity_300ms_ease-in]">
            {displayLanguage}
          </div>

          <pre className="overflow-x-auto text-left font-notion-code-font text-[85%] [tab-size:_2] pt-[2.125rem] pb-8 pr-4 pl-8 min-h-[1em] text-notion-code_block_color whitespace-pre">
            <code
              data-language={language}
              dangerouslySetInnerHTML={{ __html: highlightedCode }}
            />
          </pre>
        </div>
      </figure>
  );
}Step 3: Add PrismJS CSS for Dark and Light Themes
We won’t add the PrismJS CSS directly in the component. Instead, we’ll include it in the global CSS file to support both dark and light themes.
In your global CSS file (e.g., globals.css), add the following CSS for the dark and light themes:
/* prism css */
.light {
  .token.comment,
  .token.prolog,
  .token.doctype,
  .token.cdata {
    color: slategray;
  }

  .token.punctuation {
    color: #999;
  }

  .token.namespace {
    opacity: 0.7;
  }

  .token.property,
  .token.tag,
  .token.boolean,
  .token.number,
  .token.constant,
  .token.symbol,
  .token.deleted {
    color: #905;
  }

  .token.selector,
  .token.attr-name,
  .token.string,
  .token.char,
  .token.builtin,
  .token.inserted {
    color: #690;
  }

  .token.operator,
  .token.entity,
  .token.url,
  .language-css .token.string,
  .style .token.string {
    color: #9a6e3a;
    /* This background color was intended by the author of this theme. */
    background: hsla(0, 0%, 100%, 0.5);
  }

  .token.atrule,
  .token.attr-value,
  .token.keyword {
    color: #07a;
  }

  .token.function,
  .token.class-name {
    color: #dd4a68;
  }

  .token.regex,
  .token.important,
  .token.variable {
    color: #e90;
  }

  .token.important,
  .token.bold {
    font-weight: bold;
  }
  .token.italic {
    font-style: italic;
  }

  .token.entity {
    cursor: help;
  }
}

.dark {
  .token.comment,
  .token.prolog,
  .token.doctype,
  .token.cdata {
    color: hsl(30, 20%, 50%);
  }

  .token.punctuation {
    opacity: 0.7;
  }

  .token.namespace {
    opacity: 0.7;
  }

  .token.property,
  .token.tag,
  .token.boolean,
  .token.number,
  .token.constant,
  .token.symbol {
    color: hsl(350, 40%, 70%);
  }

  .token.selector,
  .token.attr-name,
  .token.string,
  .token.char,
  .token.builtin,
  .token.inserted {
    color: hsl(75, 70%, 60%);
  }

  .token.operator,
  .token.entity,
  .token.url,
  .language-css .token.string,
  .style .token.string,
  .token.variable {
    color: hsl(40, 90%, 60%);
  }

  .token.atrule,
  .token.attr-value,
  .token.keyword {
    color: hsl(350, 40%, 70%);
  }

  .token.regex,
  .token.important {
    color: #e90;
  }

  .token.important,
  .token.bold {
    font-weight: bold;
  }
  .token.italic {
    font-style: italic;
  }

  .token.entity {
    cursor: help;
  }

  .token.deleted {
    color: red;
  }
}
You can find other theme CSS files by navigating to node_modules → prismjs → themes, where you'll find various CSS files. Pick one you like for either dark or light mode, and paste the styles accordingly.
Step 4: How to Use This
Once the setup is complete, you can now use the Code component to display syntax-highlighted code blocks in your Next.js pages.
import Code from "@/components/code.jsx";

export default function Page() {
  return (
    <main className="bg-white text-black dark:bg-black dark:text-white flex flex-col items-center text-center justify-center w-full min-w-0 min-h-dvh mx-auto max-w-7xl">
      <h1 className="text-4xl font-extrabold mb-2"> Hii</h1>
      <Code
        block={{
          type: "code",
          code: {
            rich_text: [
              {
                type: "text",
                plain_text:
                  "#include <iostream>\n" +
                  "using namespace std;\n" +
                  "\n" +
                  '// A simple C++ program to print "Hello, World!"\n' +
                  "int main() {\n" +
                  '    cout << "Hello, World!" << endl;\n' +
                  "\n" +
                  "    // Variables and basic operations\n" +
                  "    int a = 5, b = 10;\n" +
                  "    int sum = a + b;\n" +
                  "\n" +
                  "    // Print the sum of two numbers\n" +
                  '    cout << "The sum of " << a << " and " << b << " is: " << sum << endl;\n' +
                  "\n" +
                  "    // A basic loop\n" +
                  "    for (int i = 1; i <= 5; i++) {\n" +
                  '        cout << "Iteration: " << i << endl;\n' +
                  "    }\n" +
                  "\n" +
                  "    return 0;\n" +
                  "}",
              },
            ],
            language: "c++",
          },
        }}
      />
      <Code
        block={{
          type: "code",
          code: {
            rich_text: [
              {
                type: "text",
                plain_text:
                  "using System;\n" +
                  "\n" +
                  '// A simple C# program to print "Hello, World!"\n' +
                  "class Program\n" +
                  "{\n" +
                  "    static void Main(string[] args)\n" +
                  "    {\n" +
                  '        Console.WriteLine("Hello, World!");\n' +
                  "    }\n" +
                  "}",
              },
            ],
            language: "c#",
          },
        }}
      />
      <Code
        block={{
          type: "code",
          code: {
            rich_text: [
              {
                type: "text",
                plain_text:
                  "# A simple CoffeeScript program\n" +
                  "square = (x) -> x * x\n" +
                  "\n" +
                  'console.log "The square of 5 is #{square(5)}"',
              },
            ],
            language: "coffeescript",
          },
        }}
      />
      <Code
        block={{
          type: "code",
          code: {
            rich_text: [
              {
                type: "text",
                plain_text:
                  "/* A simple CSS style */\n" +
                  "body {\n" +
                  "    background-color: #f0f0f0;\n" +
                  "    font-family: Arial, sans-serif;\n" +
                  "}\n" +
                  "\n" +
                  "h1 {\n" +
                  "    color: #333;\n" +
                  "    text-align: center;\n" +
                  "}",
              },
            ],
            language: "css",
          },
        }}
      />
    </main>
  );
}
Hii</h1>
<Code
block={{
type: "code",
code: {
rich_text: [
{
type: "text",
plain_text:
"#include <iostream>\n" +
"using namespace std;\n" +
"\n" +
'// A simple C++ program to print "Hello, World!"\n' +
"int main() {\n" +
' cout << "Hello, World!" << endl;\n' +
"\n" +
" // Variables and basic operations\n" +
" int a = 5, b = 10;\n" +
" int sum = a + b;\n" +
"\n" +
" // Print the sum of two numbers\n" +
' cout << "The sum of " << a << " and " << b << " is: " << sum << endl;\n' +
"\n" +
" // A basic loop\n" +
" for (int i = 1; i <= 5; i++) {\n" +
' cout << "Iteration: " << i << endl;\n' +
" }\n" +
"\n" +
" return 0;\n" +
"}",
},
],
language: "c++",
},
}}
/>
<Code
block={{
type: "code",
code: {
rich_text: [
{
type: "text",
plain_text:
"using System;\n" +
"\n" +
'// A simple C# program to print "Hello, World!"\n' +
"class Program\n" +
"{\n" +
" static void Main(string[] args)\n" +
" {\n" +
' Console.WriteLine("Hello, World!");\n' +
" }\n" +
"}",
},
],
language: "c#",
},
}}
/>
<Code
block={{
type: "code",
code: {
rich_text: [
{
type: "text",
plain_text:
"# A simple CoffeeScript program\n" +
"square = (x) -> x * x\n" +
"\n" +
'console.log "The square of 5 is #{square(5)}"',
},
],
language: "coffeescript",
},
}}
/>
<Code
block={{
type: "code",
code: {
rich_text: [
{
type: "text",
plain_text:
"/* A simple CSS style */\n" +
"body {\n" +
" background-color: #f0f0f0;\n" +
" font-family: Arial, sans-serif;\n" +
"}\n" +
"\n" +
"h1 {\n" +
" color: #333;\n" +
" text-align: center;\n" +
"}",
},
],
language: "css",
},
}}
/>
</main>
);
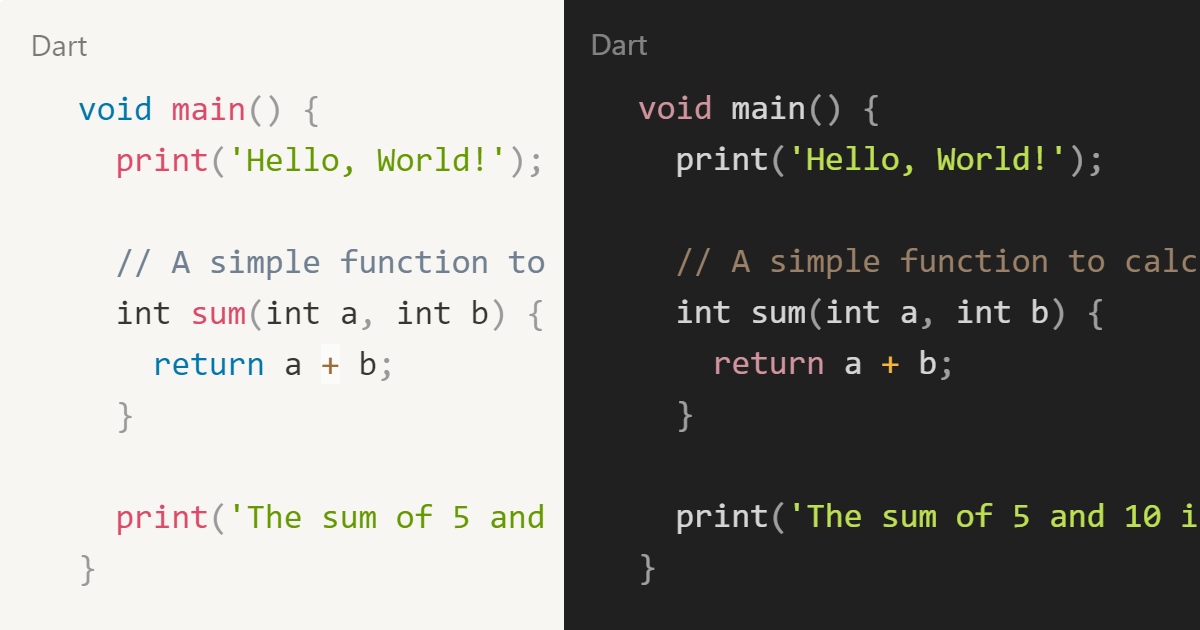
}By using this Code component in your page, you will see code blocks with syntax highlighting in both light and dark themes when toggled. Prism will automatically format the code based on its language.
Step 4: Conclusion
Now you have a fully functional static code block syntax highlighting setup in Next.js. The code blocks will be highlighted server-side, and the appropriate syntax themes for both light and dark modes will be applied based on the user's preferences. This solution leverages PrismJS and ensures smooth syntax highlighting for a variety of programming languages.
 Checkout this Blogs also


Learn how to integrate Google Tag Manager into your Next.js 15 App Router project using the official @next/third-parties package. This guide walks you through the latest and easiest method, no manual script tags, just clean integration.


Learn how to easily add Google Analytics to your Next.js 15 App Router project using the official @next/third-parties library, no manual scripts, just a simple and modern setup.

Learn how to safelist classes in Tailwind CSS v4 after the removal of the tailwind.config.js file. Discover the new method to manually define safelisted classes and ensure they are applied correctly in your project

Learn how to easily add static code syntax highlighting to your Next.js project using PrismJS, with seamless support for dark and light themes. Step-by-step guide to enhance your code readability and boost your website's visual appeal.

